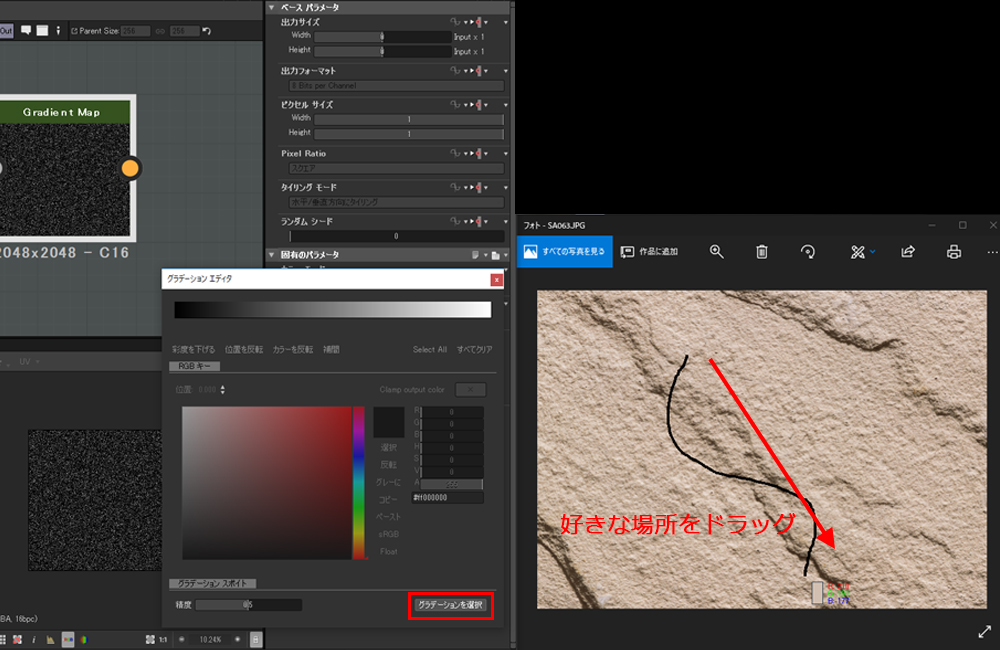
Set any parameter properties as you wish. Substance Designer for Beginners - Gradient Map in this video we show you how use the gradient map node and how can help to create textures in substance d.
Treasure Hunter Create Texture By Substance Designer Styly
Gradient Dynamic Substance 3d Designer If desired the virus can be further purified by centrifugation through a density gradient.
. Parameter mode outputs a mask detailing how color where changed. Input mode enables a mask to control the strength of the Color Matching effect. I expose a few parameters which I want to alter in the main graph to keep a.
Make a copy of a wire by CTRLClicking on the input or output plug. For this I built some small utility graphs to apply the right scale and tiling. 1 1 084 012 7.
Here I make use of various gradients to create a basic leaf shape using the curve node to remap values. Choose Expose as new graph input from the drop down list the first option. Im trying to build a library of fully procedural materials for myself and the gradient feature is great to get basic colour pass out from the height map.
The curve node then remaps the values to create a nice soft curving shape. You can change their order by dragging the handle in the left side. There is one thing though that would make my life easier.
Read through to learn his process all the way from planning to presenting the final render and his tips and tricks on maintaining the stylized look in a procedural package. The process of creating a Substance Archive is called publishing. The user can place points and adjust Bezier curves to remap the input which can be either grayscale or colorIt is especially useful when used with gradient transitions to remap them to a specific height profile it allows for very.
ShiftClick and Drag on the Input or Output Plugs to Reroute. These are the exposed parameters in Substance Designer. The Curve node provides an interface to image tonality remapping similar to other 2D image editing applications.
It looks like youre using ArtStation from Canada. Keep the following in mind when publishing SBSAR files. The Expose Parameter dialog appears.
Hold AltShift then Click on the Yellow Circle to Modify the Wire. These are the exposed parameters in Substance Designer. Find the parameter you want to expose in the Properties Window under the Specific Parameters tab.
Taking the base leaf shape I use a distance node to create a gradient inside the leaf. Toggles usage of either Mask Input or Output depending on the Mask Mode below. By utilising multiple features of Substance Designer I was able to expose properties I found desirable.
We take a look at the workflow and. Would you like to change the currency to CAD. Besides I created all the elements with the highest scale possible to have simple numbers and apply the scale at the end.
This post is sticky on my front page so check back if there are more. Shoot me an email if you have a tip too. Braydickey shared this idea November 05 2020 Flag idea as inappropriate.
Dylan Salvalaio walks us through the Stylized Bonfire and Flowing Lava materials he made with Substance Designer. STYLIzED MaterialS in Substance Designer WITH DYLAN SALVAlaIO. Effects The Distance Node will only expand pixels whose values are 128 or above.
This is a living document detailing all the cool workflow shortcuts and node observations Ive found while working in Substance Designer. This is simple slope_blur_grayscale which takes gradient map. Unfortunately Ive not managed to find a way to expose colour gradients.
Press D to Dock Nodes to Inputs. Being able to Expose gradients when exporting a substance. Sets Hue Chrominance or Luminance variations to the result if enabled.
It can be used to create all kinds of effects really. Clicking the graph in Substance Designer allows you to further label and organize the sliders and buttons. For example I created 4 colours each for different mud colours and later I want to change.
All graphs contained in a package will be contained within the SBSAR file. Click the Dropdown options button. It can be used to create all kinds of effects really.
These are the exposed parameters in Substance Designer. Anything below will just be discarded. The Curve node provides an interface to image tonality remapping similar to other 2D image editing applications.
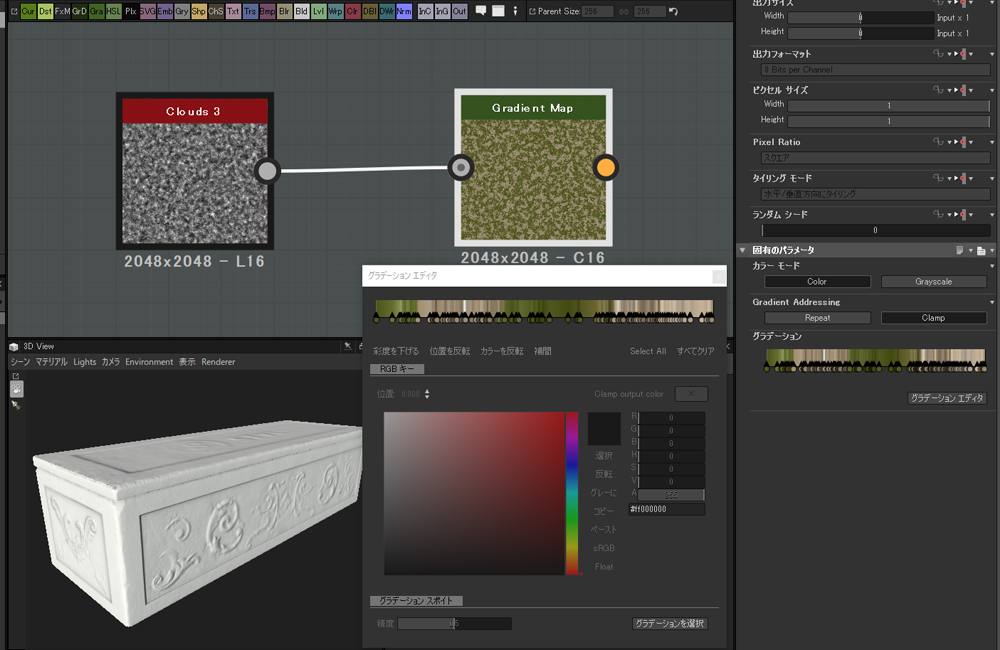
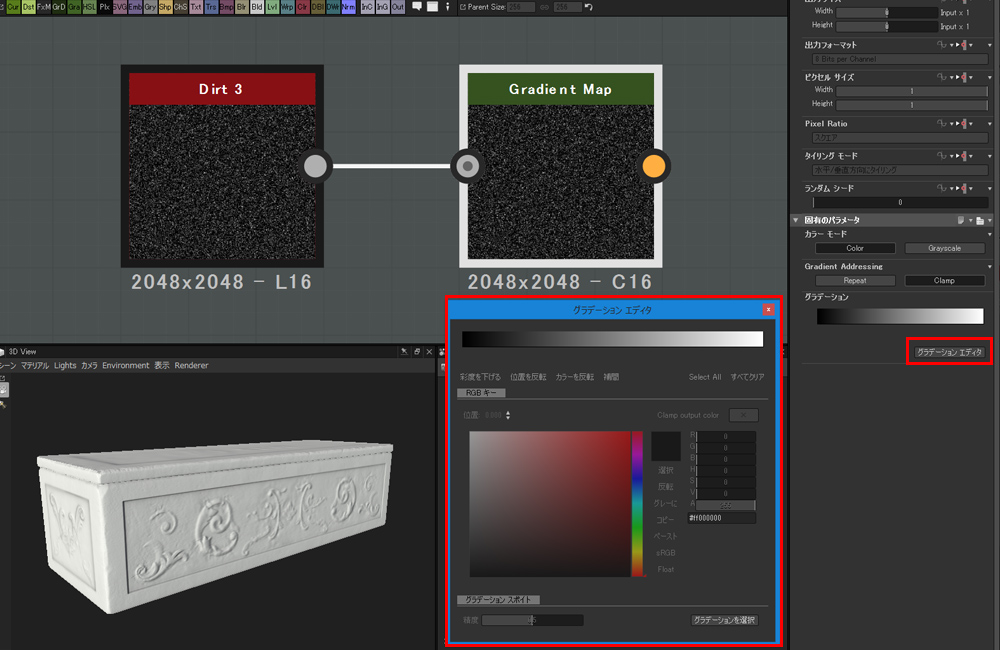
Gradient Map Parameters. Any settings or parameters of a graph that you exposed will still be available in the SBSAR. This gives me more flexibility later on to either create a mask or create random pattern colours when using the gradient node.
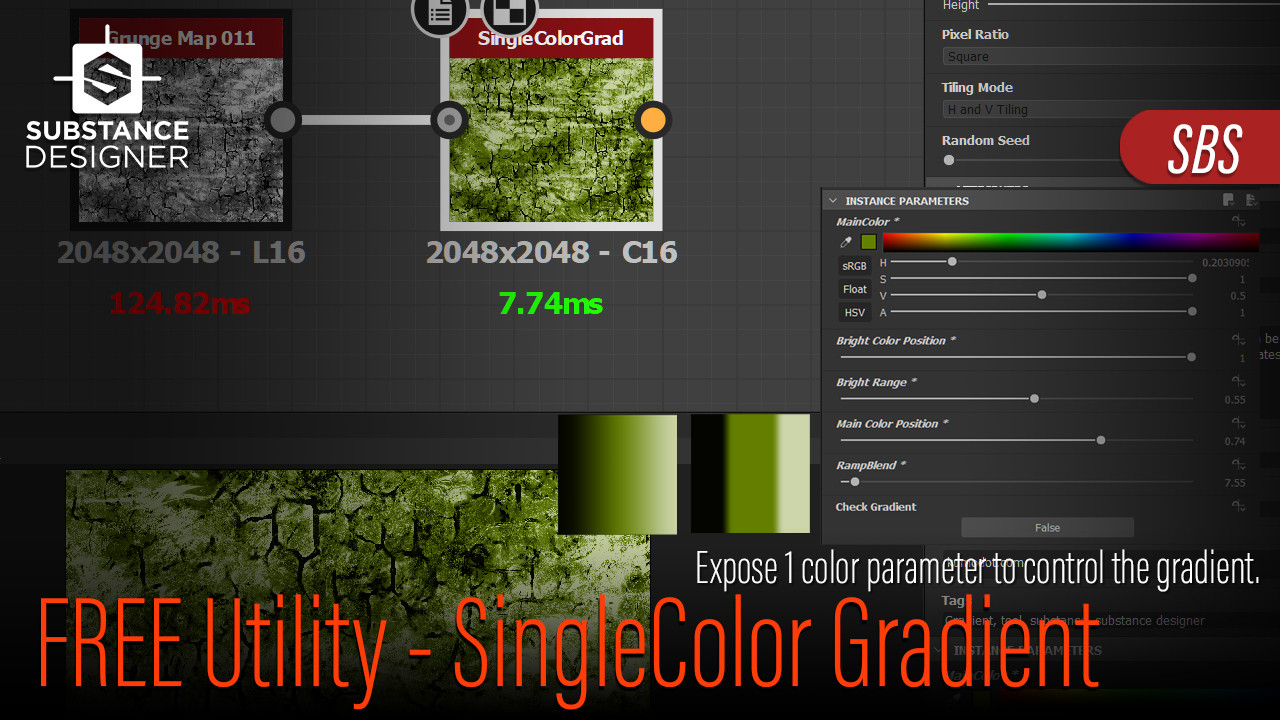
So the tiling of my material would be 1 x 7. Ability to either expose the colors used within the gradient map or ability to connect uniform color nodes to the gradient map along with the grayscale input similar to how Tile Sampler or Tile Generator can have multiple pattern inputs. What I am especially proud of are the leaks effects.
For SBSAR files you publish the package not the graph. Substance Designer for Beginners - Gradient Map in this video we show you how use the gradient map node and how can help to create textures in substance d. Set the visible if parameter in an exposed parameter.

Substance Designer 5 Dynamic Gradient Youtube
Treasure Hunter Create Texture By Substance Designer Styly
Artstation Single Color Gradient Node Free Substance Designer Utility Resources

Gradient Dynamic Node Usage Allegorithmic Substance Designer 5 Youtube

Gradient Map Substance Designer Design Forum

Substance Designer For Beginners Gradient Map Youtube

Artstation Single Color Gradient Node Free Substance Designer Utility Resources
Treasure Hunter Create Texture By Substance Designer Styly
0 comments
Post a Comment